Locate whether the fault is in the pad, adjustment housing, post, or seat mount before tightening hardware or ordering a replacement armrest.
The right ergonomic setup should adapt to your body, support frequent movement, and stay comfortable through a full workday.
To fix an office chair armrest, first identify which part is moving or damaged. A loose, accessible mounting bolt may be a straightforward model-approved correction. A pad that is peeling may need a compatible replacement. An arm that will not hold its height usually points to an internal lock or complete arm assembly, not a bolt that should simply be tightened harder.
Do not begin by taking the arm apart. Office-chair arms differ: some fasten under the seat, some connect to the backrest, and some carry controls or wiring. Find the model number and current manual, isolate the fault to one zone, and work only within the instructions for that chair. Stop using the chair if an arm, seat connection, or other load-bearing area is cracked, bent, or missing hardware.
Before you reach for a tool, decide whether the chair is safe to test
Move the chair away from the desk and remove anything hanging from it. With the chair empty and upright on a level floor, inspect the armrest in bright light. Do not sit on the arm, use it to push yourself out of the chair, or force an adjustment through resistance.
Take the chair out of service and contact the manufacturer or a qualified repair provider if you find any of the following:
- a crack in the arm post, under-seat bracket, seat frame, or another structural connection;
- a missing fastener where the arm or seat may separate;
- a bent part, stripped insert, or mounting hole that no longer holds its original fastener;
- an exposed cable, pinched wire, damaged control, burning smell, or heat;
- an internal piece that has fallen out, or a lock that releases unexpectedly;
- movement severe enough that the chair no longer feels stable during normal entry or exit.
That boundary is intentionally conservative. York University’s office-chair safety inspection guide treats visible cracks that could allow an armrest, seat, or backrest to collapse as an unsafe condition, and flags loose or missing screws for a severity-based response. The guide also notes that chair components can have a little movement by design, so movement alone is not a diagnosis.
Find the exact source of the movement
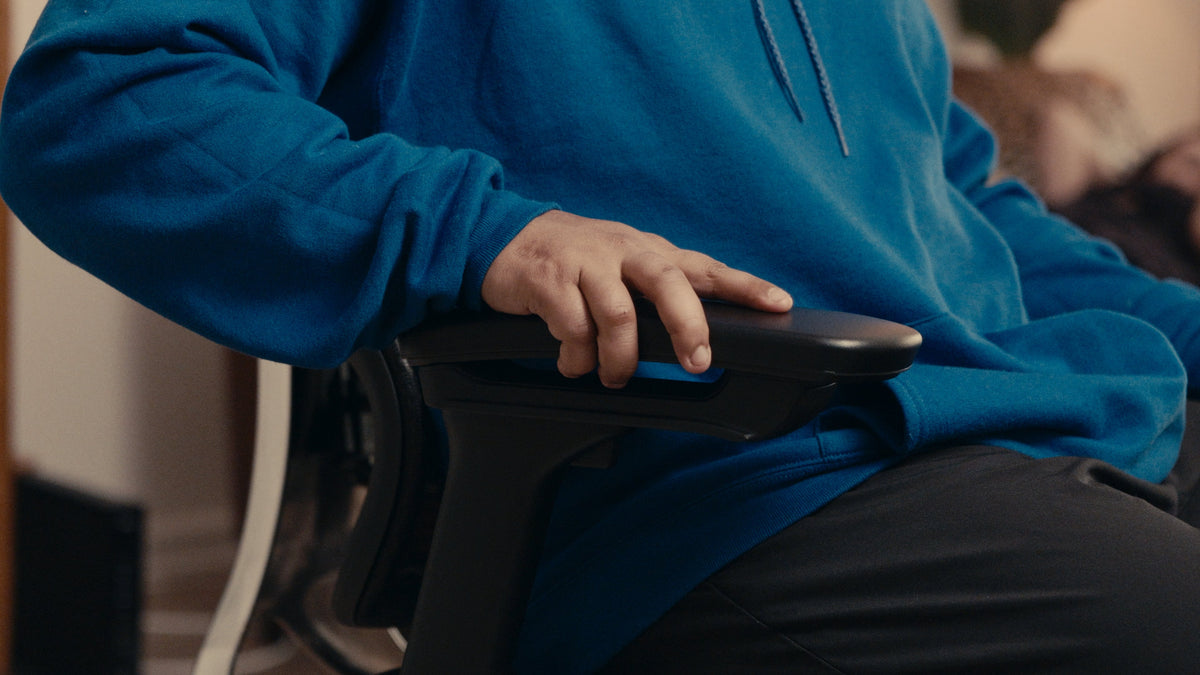
Hold the chair steady and move only one part at a time with your hand. Use light pressure—just enough to reveal where the play begins. If the left and right arms are the same design, compare their movement and adjustment feel. A difference can help localize the fault, but it does not prove that the firmer side is the correct specification.
| Where the movement starts | What you may observe | Likely next step |
|---|---|---|
| Pad or top surface | The cushion, shell, or top plate moves while the post stays still | Check whether the model has a separately replaceable pad and verify its mounting pattern |
| Top adjustment housing | The pad slides, pivots, or rattles beyond its normal adjustment positions | Check the manual for an adjustment-lock specification; otherwise route the arm module to support |
| Vertical post | The arm sinks, rises unevenly, or rocks inside the height-adjustment column | Treat it as a possible internal lock or guide fault rather than an external-fastener problem |
| Under-seat or side mount | The whole arm moves where it meets the seat or frame | Locate the exact mounting hardware in the model manual before tightening anything |
| Seat frame, backrest, or shared structure | The seat connection moves with the arm, or a crack or bend is visible | Stop using the chair and request a structural assessment or replacement part |
This isolation step prevents a common mistake: tightening the first bolt you see when the real fault is inside the arm or in a different connection. It also tells you what to photograph for support—the model label, the stationary part, the moving part, and the point where the movement begins.
Use the chair’s own documentation, not a generic screw size

Open the current manual or assembly guide for the exact model and revision. OdinLake keeps its available chair documentation on the assembly and product-guide page. Confirm that the drawing matches the chair in front of you, including the arm style and its attachment point.
Do not assume that a tool, fastener count, thread, washer order, or tightening method from another chair applies to yours. For example, the OdinLake L2 A633-101 guide shows a model-specific under-seat armrest connection. Its troubleshooting advice for a crooked armrest is to loosen the applicable bolts, correct the alignment, and retighten them; its assembly notes also tell the reader to align hardware before final tightening. That is useful for that documented connection, not permission to copy the hardware or procedure to every chair.
Before DIY work, also check the current OdinLake warranty policy or the policy for your chair’s manufacturer. An armrest mechanism may be covered, and an unapproved modification can make a simple parts claim harder to resolve.
Fix only the fault you can verify
If an accessible mounting fastener is loose
Proceed only when the manual identifies the connection and authorizes access. Use the specified tool and the chair’s original, undamaged hardware. If the instructions require the chair to be tilted or inverted, follow their stability and assistance requirements rather than balancing the chair on its controls, arm pads, or backrest.
- Support and identify the connection. Match the arm, fastener, washer order, and mounting slot to the manual. The expected result is that every part in front of you has a documented counterpart. If it does not match, stop.
- Check for an obvious hardware problem. Look for a backed-out fastener, missing washer, damaged head, cross-threaded position, or gap between mating surfaces. If a fastener is missing or the hole is damaged, do not substitute a similar-looking screw.
- Restore alignment before final tightening. Where the manual permits it, loosen only enough to seat the arm correctly. Start all applicable hardware by hand and keep the parts aligned before tightening in small alternating increments. If the fastener will not start smoothly, back it out instead of forcing it.
- Stop at the documented condition. Use a published torque value only when the exact manual supplies one. “As tight as possible” is not a specification; overtightening can damage threads, inserts, plastic parts, or alignment.
The observable result should be a flush, aligned mount with no loose hardware and no new cracking, distortion, or binding. If the fastener spins without tightening, the joint opens again, or the arm remains loose at the same connection, stop. The insert, bracket, or hardware may need replacement.
If the pad is peeling, split, or loose
Separate surface wear from structural damage. Peeling upholstery, a hardened cushion, or a split pad can sometimes be addressed by replacing only the pad, but only if the arm post and pad base remain sound and the manufacturer treats the top as a replaceable part.
Record the chair model, arm side, pad dimensions, fastener spacing measured center to center, hole count, underside shape, and any left/right orientation. A product advertised as “universal” still needs to match those fields. A slip-on cover may conceal cosmetic wear, but it does not secure a loose pad or restore a cracked base. Do not drill new holes or drive an unmatched screw into the arm to make a replacement fit.
If the arm will not stay at its height
First operate the height control through its documented range while the chair is empty. Listen and feel for the normal detents or lock positions described for the model. If the arm drops past a selected position, the button does not return, or the left and right locks behave materially differently, capture a short video showing the control and the slip.
That symptom usually belongs to the internal guide, spring, latch, or complete adjustable-arm module. Unless the manufacturer publishes a service procedure for that mechanism, do not open it, wedge it with paper, drill a fixed-height hole, add adhesive, or spray lubricant inside. Ask for the model-specific part or repair path.
If the armrest carries a control or cable
Stop before removing the arm. Some designs integrate chair controls into the armrest. OdinLake’s armrest fit and selection guide uses the O3 WireControl™ armrest as one example of why generic removal instructions can be wrong. If a cable or control enters the arm, use only the exact service instructions or contact support.
Test the result without loading the armrest like a handrail
After a documented correction, clear away the tool and inspect the work before sitting down. Then use this sequence:
- No-load check: move the pad and post gently in each intended adjustment direction. The expected result is normal movement only in the designed range, with each lock holding consistently.
- Connection check: watch the repaired joint while applying light hand pressure to the pad. The mounting surfaces should stay seated; no fastener should turn, lift, or create a new gap.
- Normal seated check: sit in the chair normally and rest the forearm lightly on the pad. Do not push down to stand. The arm should support ordinary forearm contact without slipping, tilting, or changing the chair’s stability.
- Short recheck: inspect the connection again after a brief normal-use session. Stop if the movement returns, hardware backs out, a control binds, or a crack appears.
A successful repair is not simply quieter. The intended adjustment still works, the selected position holds, the mount remains aligned, and the arm does not interfere with getting into the chair or approaching the desk. If the repaired arm no longer fits the user or workstation, use the adjacent armrest positioning check rather than forcing a mechanical adjustment beyond its designed range.
Know when the practical fix is a replacement part
| Condition | Reasonable path | Information to provide |
|---|---|---|
| Loose documented external mount; original hardware and threads are sound | Model-approved alignment and retightening | Model/revision and manual page used |
| Cosmetic pad wear; base and post are sound | Compatible pad, approved cover, or manufacturer replacement | Pad dimensions, hole spacing, underside, and arm side |
| Height lock, pivot lock, or internal guide does not hold | Manufacturer service or complete arm module | Video of the control, selected position, and slip |
| Cracked post, bracket, seat connection, or stripped insert | Stop use; structural assessment or correct replacement assembly | Close and wide photos, model label, purchase details |
| Integrated control, cable, or wiring is involved | Exact service procedure or support | Model, affected control, symptoms, photos, and video |
For an OdinLake chair, the support team can use the model label, order information, photos, and a short movement video to identify the appropriate next step. Sending the fault location you isolated is more useful than saying only that the armrest is broken.
Frequently Asked Questions
Why is my office chair armrest loose?
The movement may come from the pad, an adjustable top housing, the vertical post, or the mount where the arm connects to the seat or frame. A loose external fastener is only one possibility. Hold the adjacent part still and move one zone at a time before choosing a repair.
How do I tighten an office chair armrest?
Use the exact model manual to identify the mounting hardware, tool, washer order, alignment, and any torque requirement. Tighten only an accessible connection the manufacturer authorizes. If the fastener spins, the hole is damaged, or the joint stays loose, stop rather than applying more force.
Why won’t my office chair armrest stay up?
The height lock, guide, spring, or latch inside the adjustable post may be worn, displaced, or damaged. Operate the control empty and document where it slips. Unless the manufacturer publishes an internal service procedure, replace or service the model-specific arm assembly instead of drilling or wedging it in place.
Can I replace only the armrest pad?
Yes, when the pad is a separate serviceable part and the structure below it is undamaged. Match the chair model, pad dimensions, mounting-hole spacing, underside shape, fasteners, and left/right orientation. A cover can address appearance or feel, but it cannot repair a loose or cracked base.
Are office chair armrests universal?
No. Even products marketed as universal fit only a stated range of dimensions and mounting patterns. Complete arm assemblies are especially model-dependent because the seat connection, height mechanism, controls, and clearances can differ.
Can I glue a cracked office chair armrest?
Do not rely on adhesive for a crack in the post, bracket, seat connection, or another part whose failure could cause collapse or loss of balance. Stop using the chair and obtain the correct replacement or professional assessment. Cosmetic surface damage should also be separated from damage to the supporting structure before any treatment.