A practical decision and setup guide for converting an existing desk without sacrificing stability, seated fit, cable safety, or usable work space.
The right ergonomic setup should adapt to your body, support frequent movement, and stay comfortable through a full workday.
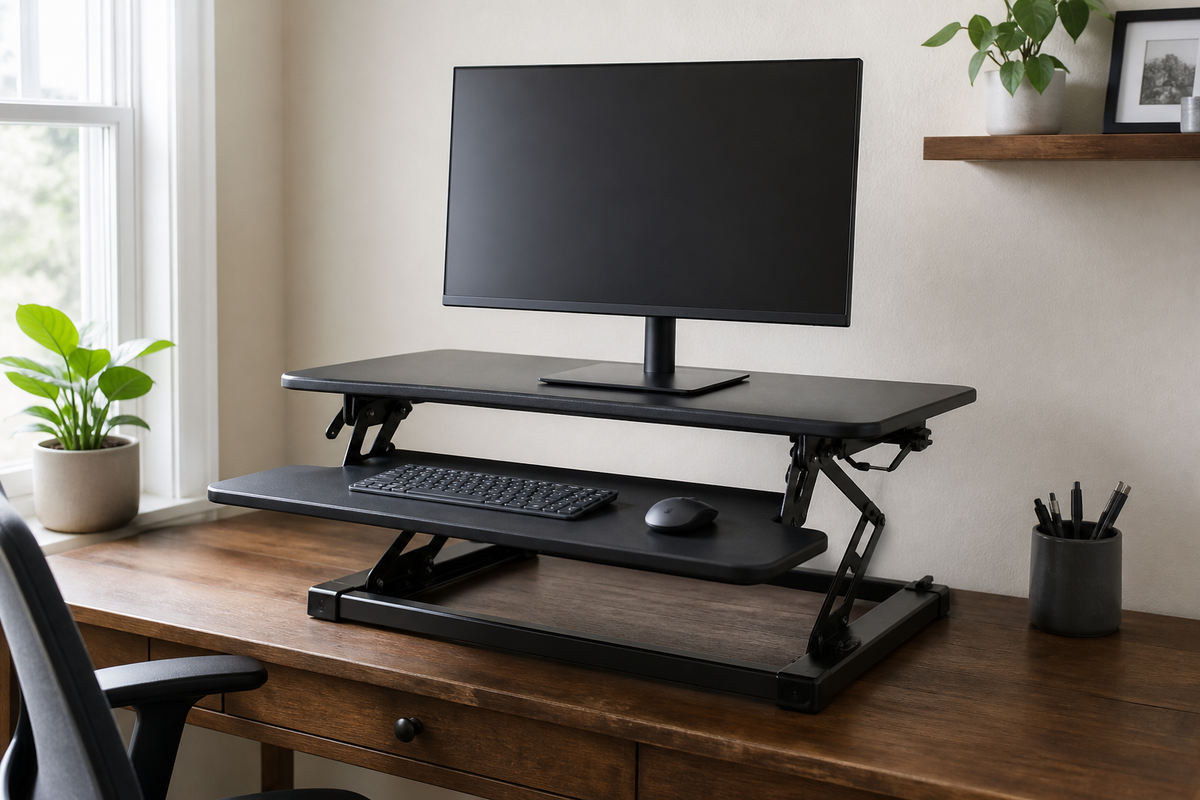
You can convert a regular desk to a standing desk in three practical ways: place a purpose-built sit-stand converter on the existing surface, reuse a compatible desktop on an adjustable frame, or replace the desk when neither option fits safely. A desktop converter is usually the least disruptive route. Reusing the top can create a cleaner full-desk setup, but only when the top and frame are documented as compatible.
Before choosing, measure the desk, your equipment, and the keyboard height you need while both seated and standing. The conversion has to remain stable, keep the mouse and keyboard within easy reach, preserve leg clearance, and let every cable move without pulling. A monitor on a stack of books may be higher, but it does not turn the whole workstation into a safe, usable sit-stand setup.
Choose the Conversion Path Before Buying Parts
“Convert the desk” can mean three different projects. Start with the smallest change that completes your actual task rather than assuming that every existing desk needs a new frame.
| Conversion path | Best fit | Main limitation to check |
|---|---|---|
| Desktop sit-stand converter | You want a reversible change and the existing desk is flat, strong, and large enough | The raised platform must fit the surface and still provide a usable seated position |
| Existing top on an adjustable frame | You want full-surface height adjustment and the desktop meets the frame maker’s requirements | Top material, dimensions, thickness, fastener locations, weight, and frame geometry all have to match |
| Complete height-adjustable desk | The current desk is built in, unstable, too shallow, blocked by drawers, or unsuitable for a converter or frame | The new desk still has to fit your seated height, standing height, equipment, and room |
A converter is not automatically the economical choice if it forces you to replace the monitor stand, removes most of the work surface, or leaves the keyboard too high while seated. Likewise, an adjustable frame is not a universal retrofit kit. The frame’s current manual and top-compatibility limits control that project.
Make a Conversion Measurement Card

Record the following measurements before comparing products. Use the equipment and footwear you normally use, and measure to the working surfaces rather than relying on a height label.
- Existing desktop: measure usable width, depth, thickness, edge shape, and distance to any wall, shelf, window, or cabinet.
- Seated input height: adjust the chair and feet first, then measure from the floor to the surface that keeps the keyboard and mouse near relaxed forearms.
- Standing input height: stand naturally with shoulders relaxed and elbows near the torso, then measure to the surface where the keyboard should sit without bending the wrists upward.
- Equipment footprint: measure the complete monitor stand or arm clamp, keyboard, mouse-use area, laptop, dock, speakers, documents, and every item that must remain on the moving platform.
- Clearance and travel: record drawers, legroom, cable endpoints, overhead shelves, monitor-arm reach, chair movement, and the path the converter or desk will sweep.
- Documented load: total the equipment weight and compare it with the converter or frame manufacturer’s current limit. Do not include a safety margin that the manufacturer has not published.
OSHA’s guidance says that component placement should support neutral working positions and that a desk should provide adequate leg clearance while allowing proper placement of computer equipment. The Canadian Centre for Occupational Health and Safety adds that a sit-stand setup should meet the user’s needs in both positions, with relaxed shoulders, elbows close to the body, and aligned hands and forearms. These are functional checks, not a universal desk-height formula.
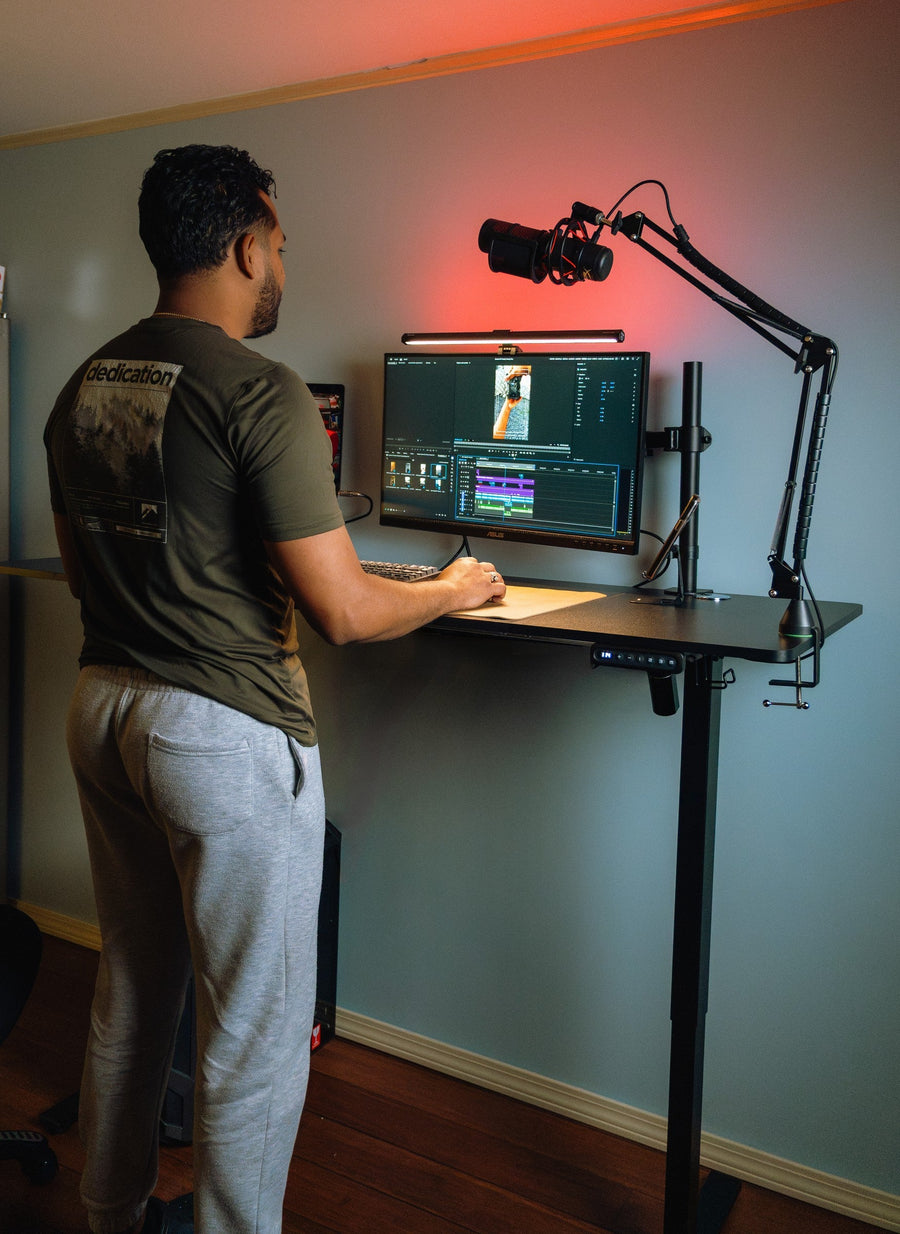
A real workstation photo can help you make the measurement card: the monitor base or clamp uses rear depth, the keyboard and mouse use the front working zone, and cables need a route between them. Measure those occupied zones instead of measuring an empty desktop and assuming the equipment will fit later.
Method 1: Add a Desktop Standing Desk Converter
This is the most reversible method because it leaves the desk structure unchanged. Use a commercial converter designed for computer equipment; do not substitute loose shelves, storage bins, or stacked household objects.
1. Confirm that the supporting desk is suitable
Clear the surface and inspect it in good light. Stop if the desktop rocks, sags, is cracked, has loose joints, or shows water damage or separated layers. Confirm that the converter’s base fits completely on a flat portion of the desk and does not rest on a beveled edge, cable grommet, drawer lip, or unsupported extension.
For glass, stone, hollow-core, antique, wall-mounted, or built-in desks, do not infer compatibility from appearance. Use the desk maker’s and converter maker’s written requirements. If neither source confirms the combination, choose a different installation path.
2. Test the footprint before placing the converter
Mark the converter’s base and raised-platform footprint with removable painter’s tape. Place the keyboard, mouse, and monitor inside the appropriate zones. Check that you can still open drawers, sit close enough to the input devices, and reach any item that must stay on the original desktop.
Remember that some converters move forward as they rise. The raised position may therefore require more room between you and the desk than the lowered footprint suggests. Use the product’s published travel diagram instead of guessing the motion from a photograph.
3. Place and load it according to the manual
Converters can be awkward or heavy. Use the handling method and number of people specified by the manufacturer. Keep fingers away from hinges, springs, scissor mechanisms, and other moving joints. Center the base as directed and use only supplied pads, feet, fasteners, or clamps.
Add equipment in the order required by the manual. Keep each item within the documented load and placement limits. A total weight below the maximum does not make it safe to place a heavy monitor far outside the intended zone.
4. Put input devices and screens on separate height plans
The keyboard and mouse should share one reachable input level. The monitor may need its own stand or arm so the screen can meet a comfortable sight line without forcing the keyboard platform too high. A laptop stand raises both the screen and built-in keyboard together, so it usually needs an external keyboard and mouse for sustained desk work.
CCOHS recommends keeping the keyboard and mouse aligned in standing much as they are in sitting, with the standing platform near elbow position and the monitor around eye level or slightly below. Use those relationships as a starting check, then adjust for the actual task, screen, and user.
5. Route cables for the full movement
Connectors should not carry the load of a moving cable. Route each lead so it has enough slack at both the lowest and highest positions, stays out of the lift mechanism, and cannot pull a device toward an edge. Keep power strips and adapters in locations permitted by their instructions, and do not run cords across a walkway. NIOSH identifies cords across walkways as an office hazard.
Move the unloaded converter slowly through its full path while watching every cable. Then repeat with the equipment installed if the manual allows it. OdinLake’s separate desk cable management guide explains how to map the moving and fixed cable zones without turning this conversion guide into an electrical project.
6. Verify both working positions
Lower the converter and perform a normal seated task for several minutes. Then raise it and repeat while standing. In both positions, check that shoulders remain relaxed, wrists are not bent upward, the mouse is close to the keyboard, and the monitor does not require persistent neck bending.
If the lowered keyboard tray remains too high, the converter has not completed the seated half of the job. If the raised tray remains too low or the monitor cannot reach a useful sight line, it has not completed the standing half. Do not solve either problem by extending the converter beyond its documented position.
Method 2: Reuse the Desktop on an Adjustable Frame
This method can preserve a desktop you like while allowing the whole surface to move. It is also a more involved structural assembly. Proceed only when the adjustable-frame maker documents that your top’s material, size, thickness, weight, and shape are suitable.
Before disassembly, photograph the current desk, label cables, and record the top orientation. Remove equipment and drawers. Inspect the underside for cracks, hidden channels, embedded hardware, previous holes, thin sections, and areas that may not hold fasteners. Particleboard, hollow sections, live-edge slabs, stone, glass, and tops with internal reinforcement each require material-specific confirmation.
Follow the exact frame manual for rail spacing, column orientation, control-box location, fastener size, pilot holes, torque, and cable routing. A drilling map from another frame is not transferable. Do not shorten structural parts, splice motor or control wiring, substitute fasteners, or drill where the top’s construction is unknown.
When the assembly is upright, test it unloaded at low height before adding equipment. Stop for uneven columns, grinding, binding, visible flex, exposed or pinched wiring, a control error, or movement that differs from the manual. If you are not equipped to lift, drill, or verify the material safely, use a qualified assembler or choose a complete desk.
Do Not Treat an Improvised Stack as a Finished Conversion
Milk crates, boxes, books, loose shelves, and stacked stools appear in many quick conversion ideas. They may raise an object, but they do not provide a documented load path, controlled movement, or a reliable way to return to sitting. A top-heavy monitor can be disturbed by typing, cable tension, or a small bump.
The problem is not that every DIY object must fail. The problem is that the user cannot verify the same compatibility, stability, retention, and movement limits that a purpose-built product is expected to document. A temporary layout mockup can help you test dimensions while equipment remains protected and unused; it should not become the working structure.
Run a Pass-or-Stop Check After Conversion
The conversion is complete only when the workstation passes all of these checks:
- Stable support: the desk and conversion device do not rock, slide, sag, or lift at an edge during ordinary input.
- Usable sitting position: the chair can approach the desk, knees and feet have clearance, and the input level is not forced too high.
- Usable standing position: the keyboard and mouse remain close, shoulders stay relaxed, and the screen can be viewed without persistent bending.
- Controlled travel: the mechanism moves smoothly without contacting walls, shelves, monitor arms, drawers, or the user.
- Cable reserve: every cable has slack at both endpoints, remains clear of pinch points, and does not cross a walking path.
- Equipment security: monitor stands, laptops, docks, and accessories stay within the intended platform zones through the complete movement.
- Repeatable positions: you can return to both working heights without balancing the platform between stops or overriding a control.
Stop using the conversion if a fastener loosens, the supporting desk changes shape, the mechanism drops or rises unevenly, a cable is damaged, or equipment shifts unexpectedly. Recheck the current manual or contact the manufacturer rather than experimenting under load.
A standing workstation is also not a requirement to stand continuously. NIOSH’s review of prolonged standing found that the ability to move and shift between standing, sitting, or leaning was a recurring recommendation. Use the conversion to make position changes possible, and keep ordinary walking and breaks in the day.
When a Complete Standing Desk Is the Better Answer
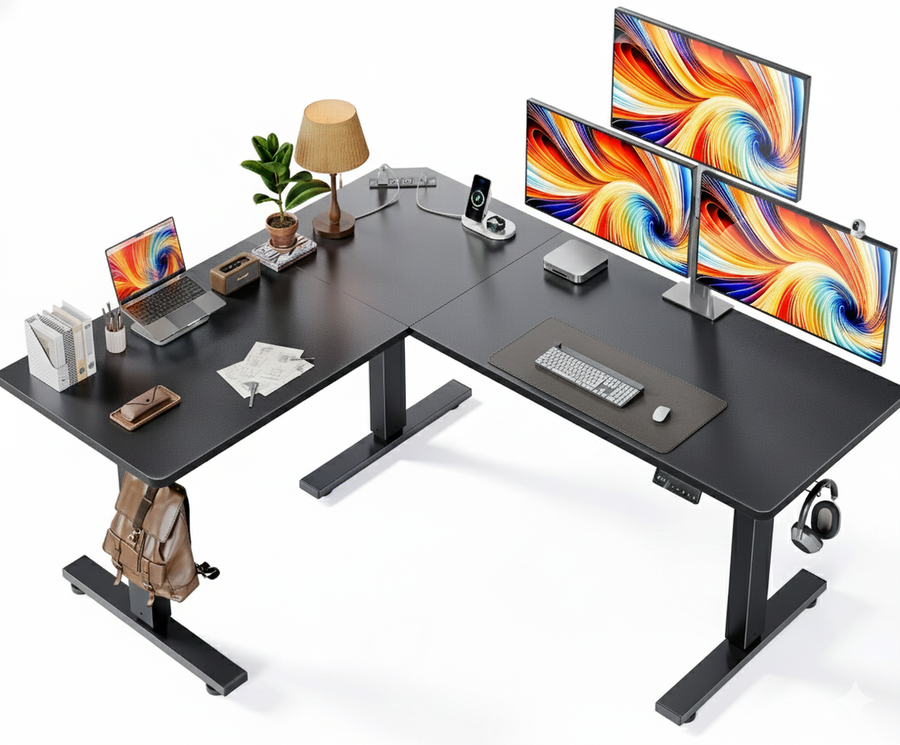
Replace rather than convert when the current desk cannot provide a stable base, the converter consumes the working surface, drawers block the input tray or legs, the lowered position is already too high, or the equipment exceeds the conversion device’s documented scope. A purpose-built height-adjustable desk may also be simpler when multiple users need different positions or when the entire work surface must move together.
Use your measurement card to compare current OdinLake standing desk options. Confirm the exact variant, desktop dimensions, height range, equipment capacity, and installation instructions before purchase. Once a compatible desk or converter is operating, preset users can follow the separate standing desk preset verification guide; programming controls are model-specific.
Frequently Asked Questions
Can any desk be converted to a standing desk?
No. A desktop converter needs a flat, stable supporting surface that fits its base, movement, and documented load. Reusing a desktop on an adjustable frame requires the top to meet the frame maker’s material, size, thickness, weight, and fastening requirements. Built-in, damaged, shallow, hollow, glass, stone, and unusually shaped desks need explicit compatibility confirmation.
Is a desktop converter better than replacing the whole desk?
A converter is often better when you want a reversible change, the existing desk is suitable, and both seated and standing positions pass the fit test. A complete height-adjustable desk is usually the cleaner choice when the converter removes too much surface, leaves the keyboard too high while seated, cannot support the equipment layout, or creates unstable or obstructed movement.
Can I reuse my current desktop on an electric standing desk frame?
Sometimes, but frame compatibility must be verified before drilling. Compare the desktop’s material, dimensions, thickness, shape, weight, and underside structure with the exact frame manual. Do not reuse another frame’s hole pattern or assume that a top is suitable because its width falls inside a broad range.
Is a laptop stand enough to create a standing desk?
A laptop stand can raise the screen, but it also separates the built-in keyboard from a comfortable input height. For sustained typing, use an external keyboard and mouse on a stable, reachable platform. The complete setup still needs a safe support surface, cable route, usable seated position, and comfortable standing sight line.
Should a standing desk converter work while I am sitting?
Yes, if the converter is intended for sit-stand use. In its lowest position, it should still allow you to sit close enough with leg clearance, relaxed shoulders, and reachable input devices. If the keyboard tray remains too high or blocks the chair and knees, the converter does not fit that workstation even if the standing position works.
How do I know whether the converted desk is high enough?
Stand naturally and check the actual task: shoulders relaxed, elbows near the torso, keyboard and mouse close, wrists aligned with the forearms, and the monitor at a comfortable sight line. Measure the input surface that passes those checks. A generic height chart cannot account for your footwear, equipment, keyboard tray, monitor stand, or body proportions.